 This is a tutorial for an adorable paper bird ornament that does not require sewing. The sewing version can be found here.
You will need the following supplies:
- Colourful cardstock, double-sided
- Tape
- Double-sided tape
- Thin ribbon for hanging
- Ink pen for drawing eyes and stitching design
 First, draw out the shape of your bird on the double-sided cardstock.
 Cut out two bird shapes per bird.
 Hint: It will be best if you just fold the paper in half so that you cut out two shapes at once.
 Cut out two triangles for the beak. Make sure that the shape is longer than the beak length that you want.
 Tape the beak shapes into place on the WRONG side (inside). You want the taped parts on the inside of the bird where it can't be seen.
 This is how it will look from the outside when you're done. See? No tape showing.
 Tape a loop of ribbon into place on the inside of the bird. This will be used to hang your ornament later.
Note: the diagrams from this image onwards were taken using a second set of cut outs. The pink colour is on the outside and the striped design is on the inside.
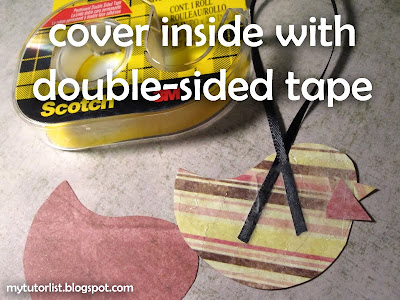
 Cover the surface of the inside of the bird with double-sided tape. Take care not to have tape hanging off of the sides.
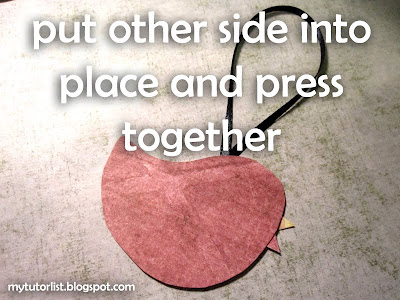
 Put the other bird shape on top and press the sides together. Now all the taped bits are on the inside of the bird where you can't see them.
 Use an ink pen to draw the eyes and some stitching lines around the inner edges of the bird shape.
 Cut out 4 identical bird wing shapes.
Hint: Fold or overlap paper 4 times over and cut all 4 wings together.
 Tape a wing shape into place on the bird. Fold a second wing in half and tape it on top of the first wing. This gives the wings some dimension so that the ornament is not boring and flat.
Repeat this on the other side.
 Ta da! Now you have a delightful paper bird ornament, and it didn't require any sewing! I think this would be a fun craft to do with your kids. A set of these ornaments would also make a nice gift at Christmas time.
Don't forget to post photos of your finished work on the Flickr page here.
Happy Crafting!

Advertise on this blog!


4 comments:
I am decidedly NOT crafty, but with our first baby coming, I really wanted to make a little something handmade for the nursery. I loved the bird mobiles I found online, but all the instructions included sewing and I cannot sew. When I came across your bird ornaments, I thought they would be perfect for the mobile! Thanks for an easy, but adorable craft! I'll let you know how it turns out when it's complete :-)
Made from plain cartridge paper these are ideal blanks for children to decorate with glitters, feathers, pompoms or pens!
Hi Helen,
Thanks for stopping by! I'm not sure what cartridge paper is, but I like the idea of glitter, feathers and pom poms!
Cheers,
Marie
It's a cute project. I loved it and will try it right away. Crafting and Ornaments always get my attention. I like spending my time, making new ornaments for my room. I have also found many new projects from this book. You should check it out!
http://www.amazon.com/Homemade-Christmas-Gifts-Crafts-beautiful-ebook/dp/B008QZ1AHI%3FSubscriptionId%3D0ENGV10E9K9QDNSJ5C82%26tag%3Dflatwave-20%26linkCode%3Dxm2%26camp%3D2025%26creative%3D165953%26creativeASIN%3DB008QZ1AHI
Post a Comment