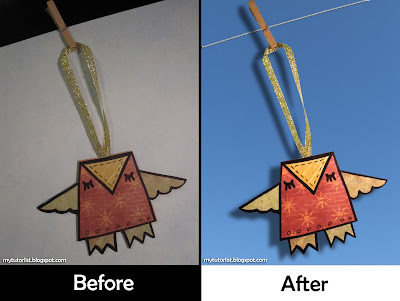
 Today is chock-full of tutorials! As an addition to the Paper Owl Ornament Tutorial, here's a Photoshop tutorial on how I created the feature image of the owl hanging from a clothesline. The original image and the final result are shown above.
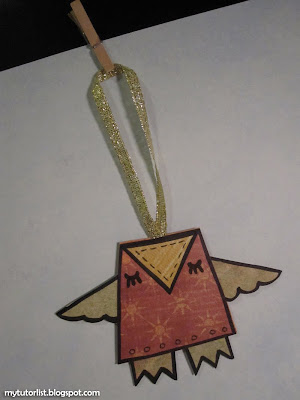 So, here's the starting image. It is OKAY, but by that I mean it sucks. It was taken in my room with the room light and a lamp light, but it is still too dark. The background sucks, and the ornament just doesn' t pop out like it should.
Here's how to fix it:
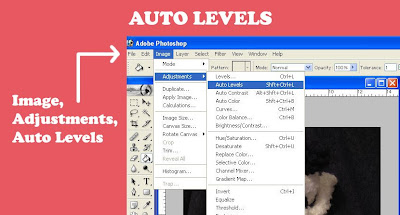
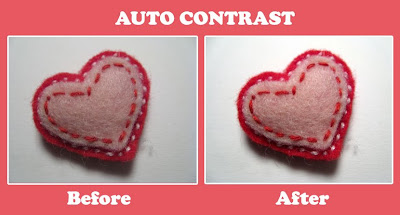
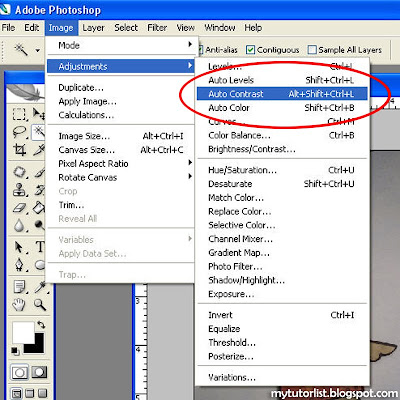 The first thing I'm going to do is to open it up in Photoshop, and adjust the contrast. I'm going to use Auto Contrast found under Image > Adjustments > Auto Contrast.
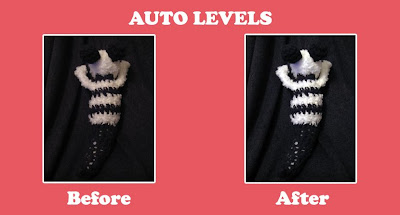
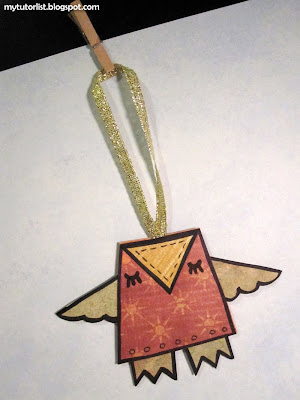 Already, the image looks much better. I want it even better now, so let's adjust the levels next.
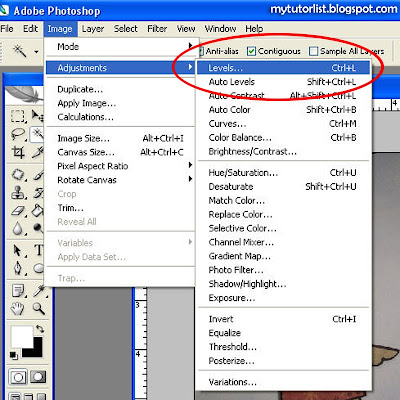 Go to Image > Adjustments > Levels.
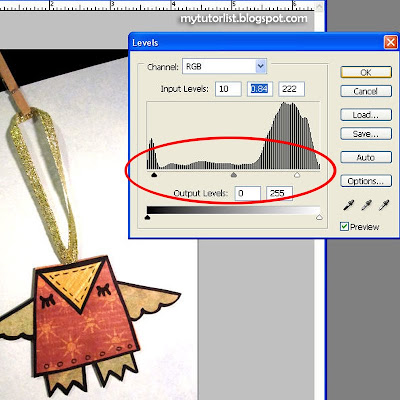 Drag the little arrows under the levels graph to adjust the levels. I personally like to adjust the middle arrow first by making the image brighter overall. Then I pull the farthest right arrow left to make the whites whiter, and I will pull the farthest left arrow right to make the darks darker. Basically, you just keep tweaking the levels until you are happy with how it looks. Then hit "Okay".
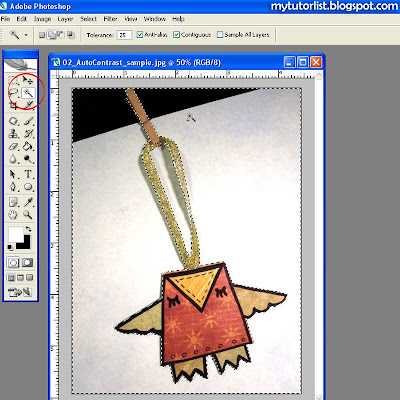 Now that my paper owl ornament looks much brighter and more colourful, I'm going to remove the background and replace it with some blue skies.
Choose the magic wand tool, set the tolerance to about 25, and click on the background. If you pick up too much background, turn down the tolerance. If you pick up too little background, turn up the tolerance.
The four sets of squares beside the tolerance setting lets you add or subtract from your current selection. Have the 2nd one selected so that you can keep adding more selected areas to your selection.
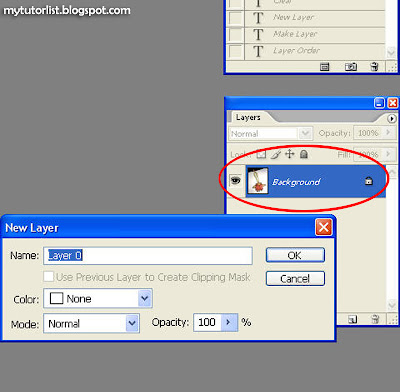 In your layers panel, double click on your "Background" layer. When the window pops up, hit okay. This will unlock your layer so that you can make adjustments to it.
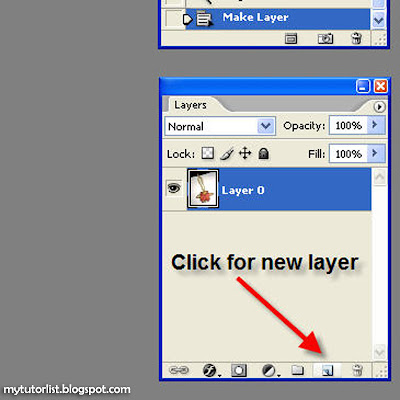 Click on the indicated icon to make a new layer.
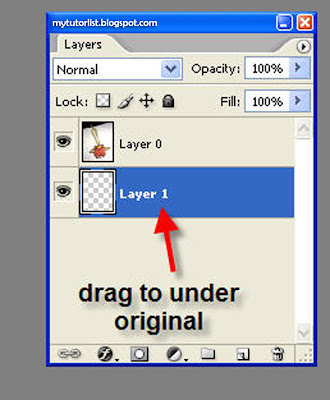 Click and drag the layer to be under the original layer.
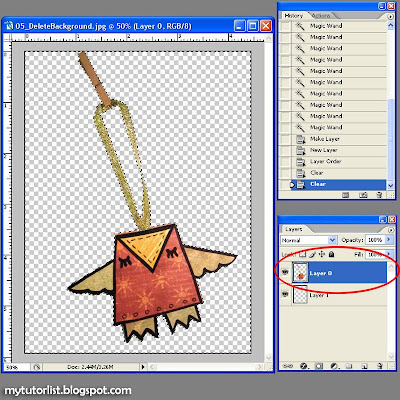 With your original layer selected, hit Delete. All of the magic wand selected areas will now be deleted. We will now replace it with a new background image. Select your new layer.
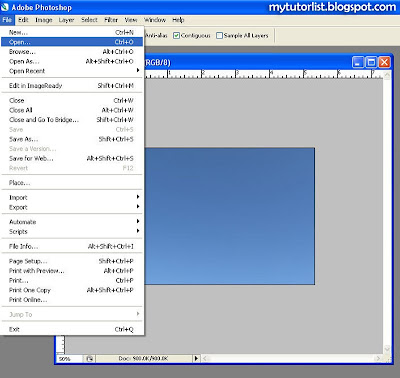 File > Open > your desired background image. Mine is a blue sky.
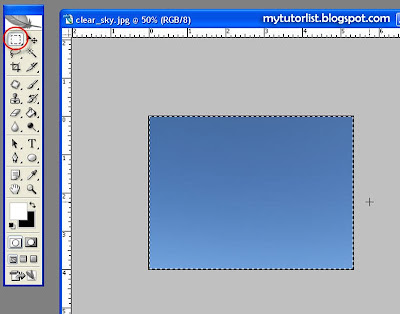 Use the marquee tool to select the entire image.
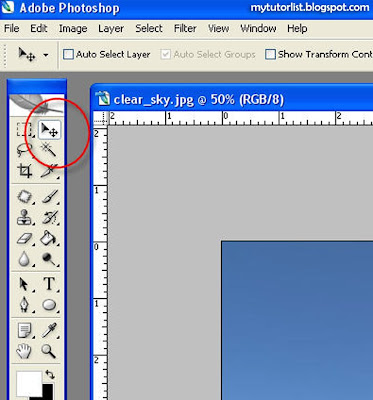 Use the moving tool to drag your background image into your working file. Make sure it goes to the new layer.
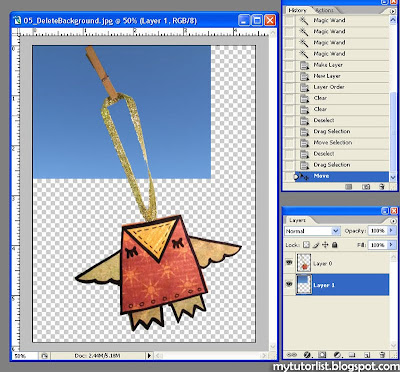 You can see the sky image under my owl image now. The sky image is too small so I am going to resize it.
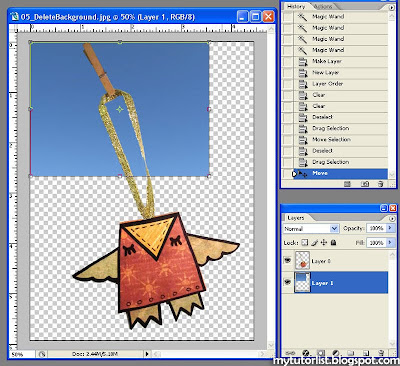 With the new layer selected, hit Ctrl-T. This will let you transform the sky image.
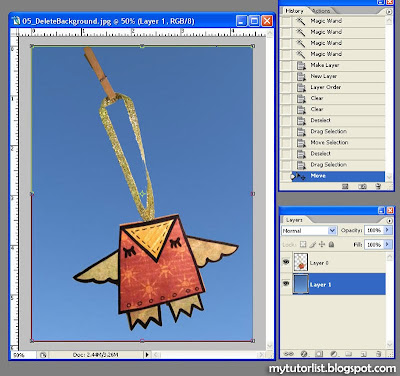 Drag the bottom corner of the sky image until it fills the whole background. Hit "Enter" when you are done.
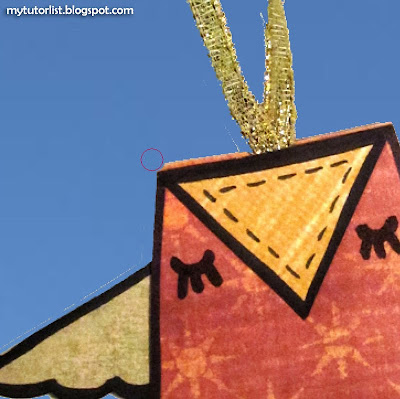 Zoom in (Ctrl + plus sign) to see the image closely. You will notice that the edges are not very clean.
Have the owl layer selected in your layer panel. Use the eraser to clean up the bad edges.
Hint: To erase in a straight line, click on the start of a straight edge. Then hold down Shift and click on the end of a straight edge.
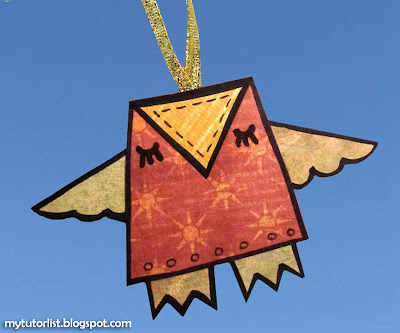 Now your edges are nice and clean! Look how great that looks with the blue background! Now we will add a clothesline.
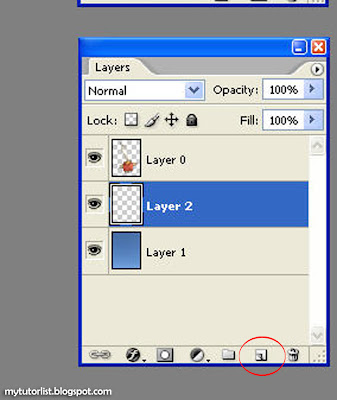 Make a new layer and draw it to under the owl layer.
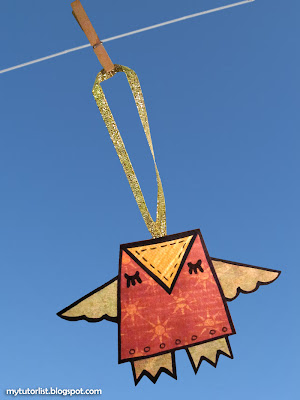 Use the brush tool to paint a light grey line to simulate a clothesline.
Hint: To draw in a straight line, click on the starting point of your line. Then hold down Shift and click on where you want the line to end.
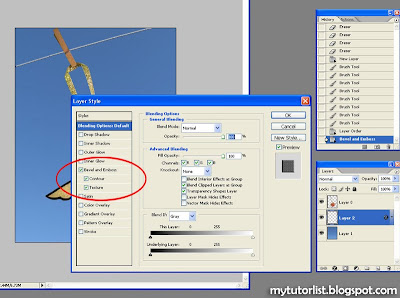 When you are done drawing the line, double click on the far-right edge of the clothesline layer. This will open Layer Style Options. Check off Bevel and Emboss, Contour, and Texture. Adjust the sliders as necessary to make the line look like rope/thread.
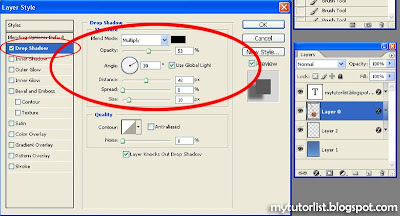 Now double click on the owl layer and open up Layer Options. Check of Drop Shadow. Adjust the Size, Spread, Distance, and Opacity to make the owl look like it has a shadow.
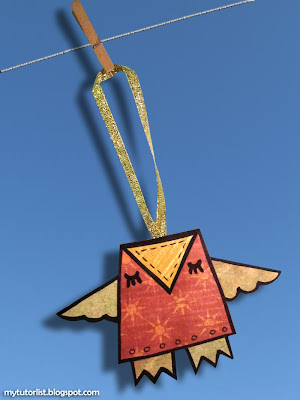 Ta da! Now isn't that a vast improvement over the original image!?
Have fun with editing your photos!


