Mytutorlist.com - Free Tutoring Classifieds Blog Home Advertise on this site! Blue Pandemonium Art and Toys Email Me!

Showing posts with label quilt. Show all posts

Sunday, October 20, 2013

Quilts I Love

Here are some quilts I have come across in my searches that I really love.  Maybe one day I can make one!
 
This person collected Munki fabrics and then made some blocks out of them.  I like Munki fabrics too.  She did a lovely job of making each square unique and cute.

The colours are great on this brick quilt, but it's the quilting on top of the fabric that really impresses me.

I love the puffy look of this quilt!

Pretty chevron quilt

A twist on the chevron - the herringbone quilt design

It's a puffy chevron quilt, what's not to love about that?

I think this diamond quilt is nice  :)

This heart quilt actually looks pretty cute  :)

I saw a rag quilt at the fabric store and I thought it looked pretty cute.  Maybe I'll make one.

This is a nice rag quilt too.

This looks like a quilt I could make!  Little squares... it can't be that bad, right?

Here's a similar one.  Very nice and clean look.

This has a nice clean look to it too.

She made this for her baby!  Awww!

This quilt is simple, but effective.  I think it looks great!

Okay, enough dreaming about what I would like to make.  Back to the homework.

Have a great week!

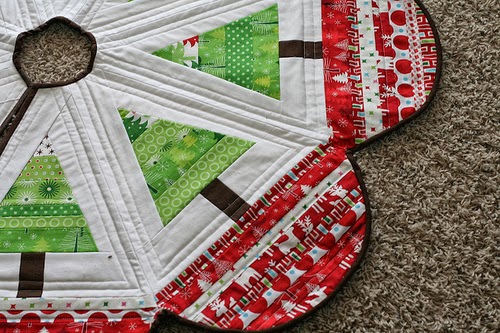
Quilted Christmas Tree Skirt Tutorials I Want to Try

I have a lot of projects that I want to do when I have time.  Here are a few tree skirts I would try if I had more time before Christmas.
This Christmas tree skirt doesn't actually look that hard to make.  I am soooooo tempted. 

This is a small table-top tree skirt.  It also doesn't look that hard, does it?  It looks like straight strips sewn together and then cut into wedges.

It's just a bunch of triangles, right?  I could TOTALLY whip that up in... a couple years. *sobs*
She only took 11 months.  That means I'll only take... oh forget it, this one is out of my reach.  But IT'S SO PRETTY!!!!

This lady proved that it's not as impossible as I think!

There isn't much of an explanation on how to do this, but I like that she used pre-made Christmas images rather than sewing her own from scratch.  It makes it seem more possible  :)

I don't think I could give this away once I was finished like the lovely lady that made this.  She is so kind!

Someone did a different version of the last pattern.  It looks nice  :)

Patchwork Pottery is awesome.  I did a few illustrations for patterns for Lauraine Yuyama a while back and I can never say enough good things about how talented she is and how lovely her designs are.  I am highly envious of her beautiful tree skirt  :D

This is a very pretty one that looks like it would be fitting for an Autumn theme too.  I like the design  :)

This one looks like it might be possible to make.  Especially because there are no rounded edges!  Hm...

Which one is your favourite?  What projects would you do if you had more time before Christmas?

Wednesday, July 4, 2012

Quilted Top For Fleece Pouch Tutorial

 Here is a tutorial for how to make the quilted top for the fleece sleeping pouches for your little animal.

***Please note that these tutorials are for you to make things for your own personal use, not to sell.***

MATERIALS NEEDED
You will need the following supplies:
  • Fleece fabric
  • Scissors
  • Sewing Machine
  • Thread
  • Ruler
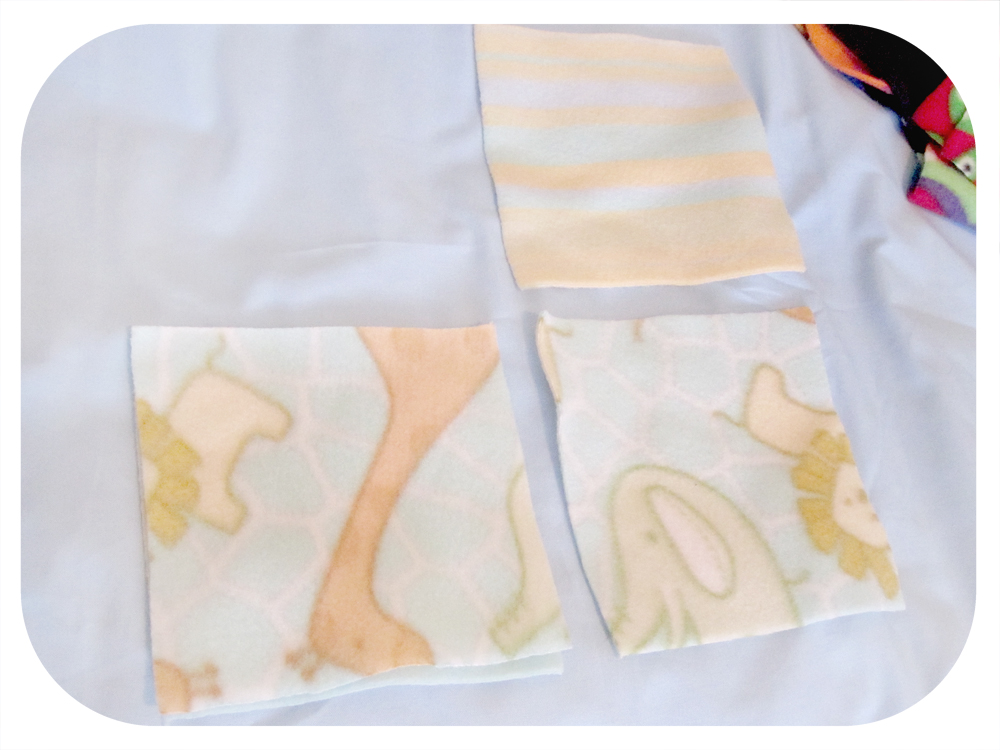
Cut four 6 x 6 inch squares of fleece.  Place them good side facing up.
 Fold one fabric square down so that the good sides of the fabric are facing each other.
Sew the top edge.
 Fold the next fabric square down so that the good sides of the fabric are facing each other.
 Sew the top edge.
 Fold one fabric rectangle set over onto the other set with the good sides of the fabric facing each other.
 Now you have a square quilt!  Nice job!  You can stop here if you want.  Just trim the fabric down to the correct pouch size you need or make this into a square pouch!
 If you want to continue, use sharp scissors to divide the squares into half.
 Trade the strips on both sides so that the pattern alternates.
 Fold one strip down so that the good sides of the fabric are facing each other.
 Sew the top edge.
 Now fold the last strip up so that the good sides of the fabric are facing each other.
Sew the bottom edge.  You're all done!  Now move onto making the rest of pouch using the Fleece Pouch Tutorial here.

Don't forget to post your finished photos to the Flickr group here.

*************************************************************

Have the tutorials and information on this blog helped you? Then please consider supporting this blog with a generous donation!